Elevate Physical Theraphy & Fitness

Author name: Elevate PT & Fitness

Five Tips to Improve Your Golf Game and Avoid Injury

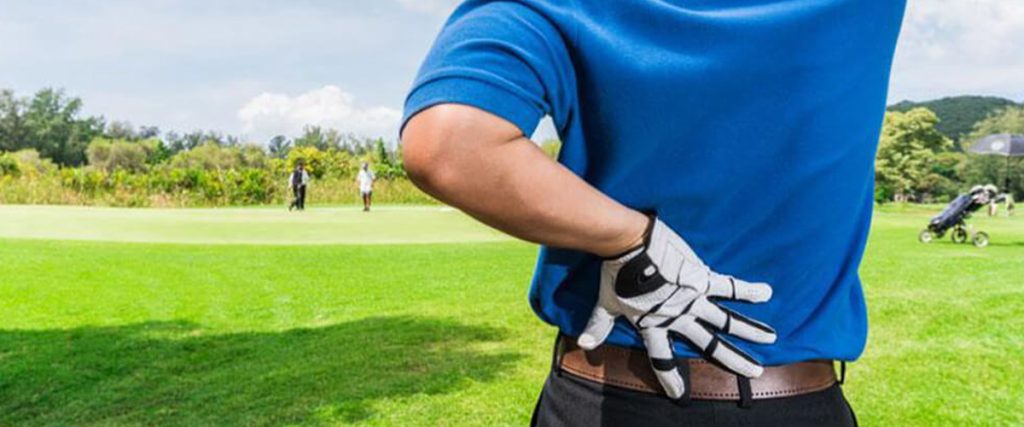
“Jack Nicklaus had it right when he said, ‘Professional golfers condition to play golf; amateur golfers play golf to condition.’ That explains why 62 percent of amateurs will sustain a significant golf injury, typically because they’re out of shape, have poor swing mechanics, or don’t adequately warm up.”  -Dr. James Andrews Like in many sports, golf requires complex, multi-dimensional movement, particularly during its golf swing. During the golf swing, the body acts as a kinetic chain and needs its parts to work in tandem. If any part of the chain is lacking, other parts of the body will start to compensate. This can lead to bad habits developing and possible injury in the future. Common swing faults manifest as poor form during backswing, downswing, or follow through. Some common problems can include deficits in balance and posture, and decreased mobility of the hips, mid-back, shoulder blades, or neck. Joint restrictions, muscle tightness, or poor body mechanics can also contribute to compensatory movements during execution of the golf swing. Here are FIVE TIPS to help you to improve your golf game and decrease risk of injury: Warm up – perform a golf-specific warm up that includes trunk rotation and static and dynamic stretching of the major golf muscles, including the shoulders, low back, hamstrings, chest, and wrists. One research article showed that the group that performed this warm up routine demonstrated improvements in club head speed compared to the control group1 Strength train the right muscles – research is showing that training the leg-hip, trunk power, and grip strength are especially relevant for golf performance improvement2 Take breaks – a systematic review found that the higher the frequency of swing repetitions, the greater the cumulative load on the low back. Maintain your back health by gradually building up your golf swing volume3 Double Strap – if you are carrying your own golf clubs, make sure to invest in a bag that has two straps like a backpack. A single strap golf bag places more stress on the shoulder it is placed on Get evaluated – get your golf swing checked out by a professional to make sure you are not developing bad swing habits that will predispose you to future injury A licensed physical therapist can provide a golf-specific program and guide you through exercises specifically designed to: Improve the flexibility of your shoulder and hip musculature. Limited flexibility can affect your backswing and follow through position. Improve mobility of your joints, including the hip, low back, mid back, shoulder, and neck. Limited joint mobility can affect your swing mechanics due to compensations Improve glute and core strength for efficient power development and transfer of energy from your hips, up through your trunk and arms, and into the golf club Improve dynamic balance through hip and abdominal control to maintain proper body mechanics throughout the golf swing At Elevate Physical Therapy & Fitness, our Doctors of Physical Therapy can help you recover from any golf-related injuries, as well as improve your golf game performance. We will assess your biomechanics and ensure proper range-of-motion and strength to achieve optimal golf swing mechanics. We can also create a treatment or fitness plan to address any deficits that are impacting your golf game to help you play at your best! Whether you play golf for a living or just a few times a year, physical therapy can help to prevent golf-related injuries and promote optimal fitness to improve your golf performance. Through the months of January & February we will be posting weekly practical tips and tests on Instagram to help with your golf swing. Check us out @elevateptfit! Stay healthy. Stay well. Stay active.    References Fradkin A. Improving golf performance with a warm up conditioning programme. Br J Sports Med. 2004;38(6):762-765. doi:10.1136/bjsm.2003.009399 Torres-Ronda L, Sanchez-Medina L, Gonzalez-Badillo J. Muscle Strength and Golf Performance: A Critical Review. J Sports Sci Med. 2011;10(1):9-18. M. Lindsay D, A. Vandervoort A. Golf-Related Low Back Pain: A Review of Causative Factors and Prevention Strategies. Asian J Sports Med. 2014;5(4). doi:10.5812/asjsm.24289

Holiday Eating Tips from a registered dietician

HOW TO STILL ENJOY THE HOLIDAYS  WITHOUT RUINING YOUR NUTRITION Casey Thomas R.D. | caseythomasrd@gmail.com Today, I’m going to provide you several strategies that will allow you to still enjoy your holiday food without having it set you behind on your goals.  Even a bodybuilder with the strictest of diets can tolerate an indulgent meal 1x/month.  For people like us, we can do it 1-2x/week while dieting and still be fine, as long as we  are mindful about what we choose.  Here’s what I want you to do:  Strategy #1 – Don’t Skip  I know many people who skip their earlier meals before a holiday feast in an attempt to  offset the calories they plan on eating. However, all this does is make you hungrier.  Then you binge, and eat even MORE calories than if you hadn’t skipped your earlier  meals.   My recommendation? Eat a hearty snack before – something like vegetables and  hummus, an apple with nut butter, or a turkey roll-up.   Strategy #2 – Out of Sight, Out of Mind  Don’t post up next to the treat table or hang out in the kitchen! You know you’ll end up  snacking.  Strategy #3 – No Liquid Calories  I know there’s going to be all sorts of liquid calories – juices, eggnogs, sodas, etc. (see  next section for alcohol strategies) – and they are the most dangerous items. They  provide zero nutrients, zero satiety, and the most calories. I’d rather you save the  calories for your favorite dessert than chug a few sodas. At least the dessert will have  some nutrients (however small). More importantly, solid desserts will also give you  some satiety cues.   What’s so special about drinks anyway? You can get a Coke anytime, but you only get  that signature dessert once a year! Strategy #4 – Don’t Binge Drink  Binge drinking is not conducive for a long and healthful life. If you’re still doing it  regularly, you need to grow up. Alcohol provides a whopping 7 kcal/g and is frequently  paired with sugar. You’re basically ingesting a fluid that gets converted directly into fat  (not to mention the other downsides, like suppressing your inhibitions and increasing  your appetite).  The rule of thumb for drinking is this: if you felt it the next morning, you drank too much.  For those of you who need to be serious about your diet – don’t have more than two (for  men) or one (for women) drinks on those occasions.  Pro Tips:   Avoid mixed drinks and go for spirits. They have the fewest calories.   Eat less fat if you plan on drinking. Alcohol suppresses fat metabolism, meaning  the fat you eat becomes fat.  Don’t train and drink alcohol on the same day – you will ruin your effort. You  need quality nutrients post-training. Far better to train hungover than to drink  after a tough session.   Strategy #5 – Make the Core of Your Meal Be Boiled/Steamed Vegetables and  Lean Protein  Note: This strategy is for those of you who need to be really strict with your diet.  Be careful with your sauces and carbs if you decide to include them. Carbs are the  toughest to gauge and have the most ‘sneaky’ calories added in.   Strategy #6 – Take a Break Before Seconds  I know the food was delicious. I know you want more.   Pace yourself.   Satiety cues can lag behind, especially when eating the hyper-palatable (i.e., very tasty)  foods common to the holiday season.   My recommendation? Take 10-20 minutes after your first plate to give your body some  time to realize it’s full. And if you still want seconds after that, go for it.  Strategy #7 – Don’t Be Afraid to Leave Food on the Plate  Listen to your body and don’t eat if you’re no longer hungry. Important note: ‘No longer  hungry’ is very different from ‘food coma’!  And don’t worry about missing out – save leftovers.  Strategy #8 – Have a Good Support Network  People who diet without support from their loved ones fail. People who turn anti-social  when they diet also fail.  You owe your support network honesty. Explain to them what you’re doing with your  nutrition, and also tell them why you are doing it. Explain to them the importance of your  goal.   But please keep in mind that relationships go both ways. While they should be  supportive of you, you still need to be supportive of them. Ask them what they need  from you to maintain a healthy relationship.   And please, please, please – don’t look down on them if they decide not to also follow  your diet! YOU are the one who chose to go on this nutrition journey. Don’t act entitled.   The main goal when dieting should be to have the smallest negative impact on your  friends and family.   Strategy #9: Food is Only One Part of Your Life  Nutritionists like to think nutrition is all there is to life. They push the ‘all-or-none’  mentality.   I disagree.   I believe it’s about being happy and being as healthy as you can be to do all the things  you want to do in life.  Can I find any nutritional redemption in my Mom’s fresh baked cookies? Not really, but  that doesn’t mean I’m going to turn one down when I’m visiting my family for a holiday.  I’m trading a bit of food quality for some happiness. I know it, and I don’t feel guilty  about it.  You know what junk foods are. I don’t need to give you a list. You need to weigh your  danger foods against what you want out of life, and if your danger foods are stopping you from getting what you want, then you definitely need to change something  about them. The main point I want to get across here is that you need to be intentional with your  food. It should always serve a purpose. Is this meal chosen to be healthy for you?  Great. Does it contain some junk items but was chosen for happiness? Still great.  Doesn’t matter,

Strength Training for Mobility

Have you ever wanted to improve your flexibility because you feel stiff? Have you ever stretched and stretched without feeling like your flexibility improved? Do you not have the time to stretch after working out? Well, we have some good news for you! Research is showing that strength training is just as good as stretching for flexibility. Strength has also been shown throughout literature to have many benefits, including improving balance, decreasing risk of falls, and improving sports performance.1,2 You can’t go wrong with getting stronger. However, you can also target flexibility at the same time through strength training. In this blog post, we will compile what the research says and then provide practical tips for you to start getting those improvements in flexibility while getting stronger at the same time!  If you’re not a fan of reading through research, you can skip to the bottom for a summary. Without further ado, let’s dive into the research: In one study that compared full range resistance training versus static stretching, there was no difference found in the flexibility of multiple joints after just 5 weeks of strength training.3  In another study, individuals with tight hamstrings (you might be able to relate) were split into three groups: a control, stretching, and strength training group. Both the stretching and strengthening group demonstrated improved hamstring flexibility, but only the strengthening group improved in strength.4  In terms of number of sets that should be performed to maximize flexibility, a study found that there was no significant difference between performing one set, three sets, or five sets of an exercise.5 That means less work to still get results! “How often do I have to work out?”, you might ask. Researchers looked at the effect of resistance training performed at different weekly frequencies on the flexibility in older women. Both the group that exercised twice a week and the group that exercised three times a week demonstrated improved flexibility. In general, there may be greater benefit to increasing the training volume for a given muscle.6  Based on all these studies, here are some principles of strength training to improve flexibility: Length of time – you should be able to see results in as little as 5 weeks!3  Range of motion – exercises need to be performed through the full range of motion in order to be effective.3  Repetitions – typically 8-12 RM (your muscle should be pretty tired after finishing your 10th rep) or 60-80% of your 1 rep max.4  Sets – just one set is enough to create change, as long as the intensity is high enough!5 Frequency – the more frequent, the better. At least twice a week will be effective, but three times a week would result in greater improvements.6  Age – the research was performed on college-aged students all the way to older women in their 60’s. However, strength training is safe for kids as young as 8 years old according to the Mayo Clinic. Similarly, strength training is also appropriate, and often much needed in seniors, as long as the strengthening is progressed gradually. If you have any concerns, please reach out to a healthcare professional for guidance! You might still have questions about breathing techniques, how to progress the weights, and which exercises you should do. If you want 1 on 1 guidance through a personalized strength training program, please visit us at Elevate Physical Therapy & Fitness for us to take your strength and flexibility to the next level! Stay healthy. Stay well. Stay active.  References Lee, I. and Park, S., 2013. Balance Improvement by Strength Training for the Elderly. Journal of Physical Therapy Science, 25(12), pp.1591-1593. McGuigan, M., Wright, G. and Fleck, S., 2012. Strength Training for Athletes: Does It Really Help Sports Performance?. International Journal of Sports Physiology and Performance, 7(1), pp.2-5. Morton, S., Whitehead, J., Brinkert, R. and Caine, D., 2011. Resistance Training vs. Static Stretching: Effects on Flexibility and Strength. Journal of Strength and Conditioning Research, 25(12), pp.3391-3398. Aquino, C., Fonseca, S., Gonçalves, G., Silva, P., Ocarino, J. and Mancini, M., 2010. Stretching versus strength training in lengthened position in subjects with tight hamstring muscles: A randomized controlled trial. Manual Therapy, 15(1), pp.26-31. Leite, T., Júnior, R., and Reis, V., 2011. Influence of the Number of Sets at a Strength Training in the Flexibility Gains. Journal of Human Kinetics, 29A(Special-Issue). Ribeiro, A., Carneiro, N., Nascimento, M., Gobbo, L., Schoenfeld, B., Achour Júnior, A., Gobbi, S., Oliveira, A. and Cyrino, E., 2015. Effects of different resistance training frequencies on flexibility in older women. Clinical Interventions in Aging, p.531. Simão, R., Lemos, A., Salles, B., Leite, T., Oliveira, É., Rhea, M. and Reis, V., 2011. The Influence of Strength, Flexibility, and Simultaneous Training on Flexibility and Strength Gains. Journal of Strength and Conditioning Research, 25(5), pp.1333-1338.

Personalized Blood Flow Restriction (PBFR) has Arrived!

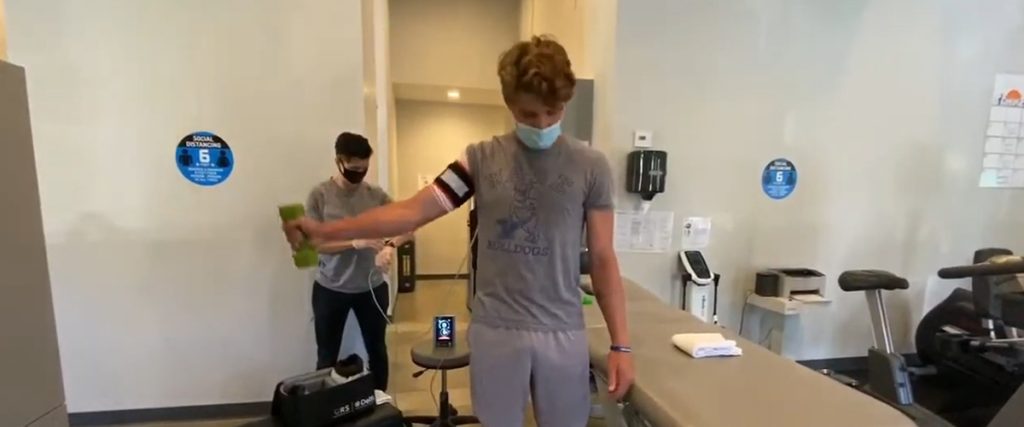
We’re committed to always ELEVATING our game and offering the most cutting edge therapies at Elevate PT & Fitness, and, to that end… We’re THRILLED to announce that we now offer Personalized Blood Flow Restriction (PBFR) training for rehab, fitness & sport performance by Owens Recovery Science, the gold standard in the industry, featuring the Delfi Tourniquet System! Employed by college and pro teams including the NFL, MLB, NBA, NHL, and the US Army, and featured in Sports Illustrated, 60 Minutes, Time magazine, Outside.com, ESPN and the Discovery Channel, this technology is a game-changing performance training and injury rehab therapy that’s producing dramatically positive results for us every day.   Here’s a short video of an upper body series with a Yale lacrosse athlete who is using PBFR training for sport performance on a lift recovery day. Elevate PTs are certified in PBFR.  What can PBFR do for you?? Increase strength and muscle hypertrophy with only 30% of an individual’s one repetition max Diminish atrophy and loss of strength from disuse and non-weight bearing after injuries. Improve muscle endurance in 1/3 the time Improve muscle protein synthesis in the elderly Improve strength and hypertrophy after surgery Improve muscle activation Increase growth hormone responses Safe to use among youth clients as young as 12 Can help reduce muscle soreness and optimize performance immediately and 24 hours after treatment TRAIN AND REHAB SMARTER @ELEVATEPTFIT concierge@elevateptfit.com  or call 424.322.8585

Low Back Pain? Make PT Your First Stop… The Sooner the Better

Low back pain?  You’re not alone. Low Back Pain (LBP) is common, costly, and debilitating.  “Epidemic” is a word commonly used by experts. Lifetime prevalence of low back pain (LBP) is about 70%.  LBP alone accounts for 2.5% to 3% of all physician visits annually in the United States. It is the most common reason to see a primary care provider in the US second only to the common cold.  Healthcare costs for LBP in the US were ~ $86 BILLION in 2005, a 65% increase from 1997 estimates, and they continue to rise. Yet despite increasing resources, recurrence is common (24% – 33% likelihood), and back pain numbers continue to grow, with chronic low back pain the fastest growing segment, estimated to be ~ 10% of cases.  Costs from lost work productivity due to LBP in the United States exceed a staggering $7 billion dollars annually. Money spent on lumbar fusions for low back pain in the US annually is roughly equal to what the US government spends on foreign aid annually — ~ $20 billion (compared to cancer research for prostate, breast and lung cancer combined, $1.9 billion).  The United States had dramatic increasing trends in MRIs, opioid prescriptions, epidural steroids and fusions from 1994 – 2004, and yet, we do not see improved outcomes in chronic low back pain. 44 million medication prescriptions were written for LBP in 2000, of which hundreds of thousands of people experienced life-threatening adverse events and deaths.  In one large study of over 2,000 patients with LBP, the most common initial treatments were opioids (~ 40%) and muscle relaxants (~40%). Despite the noted increasing medical expenditures dedicated to its management with these interventions, the prevalence of chronic, disabling LBP continues to increase. The majority of patients with LBP initially access healthcare through a primary care provider.  Given the volume of patients with LBP managed in primary care, decisions in this setting have substantial implications for process of care and overall healthcare cost.  Research shows that there are wide variations in primary care practice for decisions such as prescribing medication, ordering imaging, and referral to specialists. Physical Therapy Clinical Practice Guidelines that synthesize the latest clinical research for LBP recommend an active approach to physical therapy care with the focus on exercise interventions and other strategies to help patients maintain and improve their overall activity levels.  Despite this recommended approach and the fact that various interventions within the scope of practice of physical therapists (eg, exercise, spinal manipulation / manual therapy, education) are recommended as effective, unfortunately, many physicians mostly recommend delaying referral to physical therapists for at least 4 weeks following initial primary care consultation.  This “wait and see” approach is based on the belief that most patients with LBP will recover rapidly, and intervening quickly would not be cost-effective. However, more and more, the evidence is indicating that this belief and approach to managing LBP is failing patients and burdening the healthcare system.  Despite current medical management guidelines to the contrary, the current approach has yielded high rates of initial use of imaging, nonsteroidal anti-inflammatory drugs, and opioid medications in the initial management of patients with LBP.  There is not evidence that clinical outcomes are improving with these interventions; in fact, rates of chronicity related to an episode of LBP are increasing.  A majority of “wait and see” patients go on to experience persistent and/or recurrent symptoms, and up to one-third report moderate to severe pain 1 year following the initial primary care encounter.  Contrary to current medical practice guidelines, early use of imaging and opioids are common, as referenced above, and are associated with higher rates of prolonged disability, invasive procedures (injections and surgery), greater cost and poor quality of life. What’s the missing link to successful recovery from LBP?  Evidence points more and more to Physical Therapy-guided active recovery.  We see improved outcomes, lower costs and reduced risk of invasive procedures like injections and surgery when compared to delaying care, opioids, and early imaging.  Yet primary care referral rates were as low as 7% in a very large study of 32,000 people with low back pain. In a study across more than 400,000 low back pain patients, the evidence showed: Significant DECREASE in likelihood of surgery when people receive PT in the acute (1 – 30 days) and sub acute phase (31 – 90 days) Significant DECREASE in risk for injections in those who received PT in acute or subacute phase vs. chronic (91 – 365 days) Significant DECREASE in frequent (11 or more) office visits for LBP who received PT in acute or subacute phase Overall, patients who received PT within the first 30 days had fewer episodes of doctor visits, epidural injections, and surgeries in the year compared to those who received PT after 90 days (chronic phase). And yet… Mean time to initiate PT in this very large study was 86 days. Physical therapy evidence-based interventions, and clinical reasoning to match the right patient to the right treatment at the right time by a physical therapist earlier in the course of care, can prove more cost-effective by promoting recovery and reducing the need for more invasive and costly interventions. The good news is, this trend is improving as the research becomes clearer and is broadly shared across the medical system, and evidence-based guidelines are more and more integrated into medical practices.  So we’re headed in the right direction for best practices. At Elevate, we treat people experiencing low back pain A LOT, and in our model of 1:1 care with our highly experienced Doctor of Physical Therapy and our Evidence-Based Approach, we have great success.  If you’re having back pain, don’t delay any longer.  The sooner you receive proper care, the better.  And don’t despair if your pain is longer standing.  We also treat many people coping with chronic low back pain very successfully as well. No physician referral or prescription is necessary. California is a Direct Access state allowing you to go directly to Physical

ANKLE INJURY REHAB

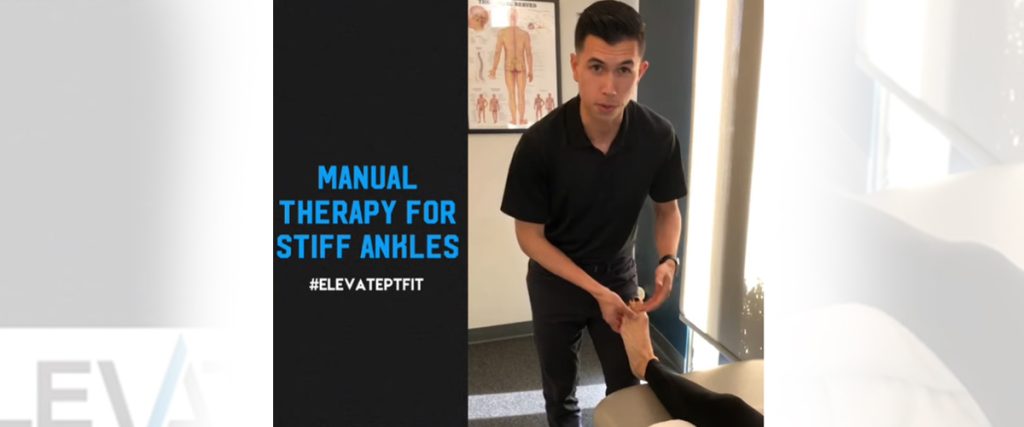
Don’t Dismiss Ankle Sprains: Manual Therapy, Balance, and Beginner to Advanced Exercises The ankle is one of the most common sites of injury in exercise and sports.  In a recent study, ankle sprain accounted for 76.7% of injuries in sports (1). While more common in sports, ankle sprains also occur in every-day activities like walking on uneven ground or stepping off a curb. Up to 70% of people who sprain their ankles will continue to have difficulty with them. In fact, once an ankle is sprained, up to 80% of people will suffer recurrent sprains (2), and up to 72% will develop symptoms of chronic ankle instability (CAI) (3). Between 5% and 19% of athletes experience psychological distress following an injury to levels comparable with patients receiving treatment for mental health illness (4). Stress increases the risk of an athletic injury (5). Rehabilitation following injury can be adversely affected by loss of confidence, fear, and anxiety. To safely return to exercise activities, it is crucial to train physical and cognitive demand, as well as sport-specific technical skills (6) in order to establish optimal neuromuscular control, injury reduction, and overall performance capabilities (7). Ankle sprains can be very disabling, as the research shows.  These data suggest that it’s important to better care for ankle sprains.  The good news is, research also shows that individuals who have sprained their ankles can benefit from a physical therapy program that includes manual therapy and a supervised exercise program. Potential benefits are less pain and improved ability to perform daily activities and return to sport (2). What follows is an evidence-based rehabilitation approach for various ankle injuries including the management of ankle sprains.  What we do as Doctors of Physical Therapy at Elevate PT & Fitness always depends on our thorough evaluation of each individual patient.  What interventions we choose and when depends on the specifics of the injury, the tissues involved, a patient’s pain  and function level, and patient-specific goals.  In this article you’ll see a manual therapy intervention; early-stage non weight-bearing exercises for important ankle muscles often weakened in an injured ankle; balance and proprioception exercises; and high level plyometric training. Manual Therapy Joint Mobilization: Manual therapy joint mobilization techniques are used to modulate pain and treat joint dysfunctions that limit range of motion (ROM) by specifically addressing the stiffness and altered mechanics of the joint. The altered joint mechanics may be due to pain and muscle guarding, joint effusion, contractures or adhesions in the joint capsules or supporting ligaments, or malalignment or subluxation of the bony surfaces. Non Weight-bearing Band Resistance: Non weight-bearing exercises allow activation of muscle tissue, low-intensity stress through connective tissue (ie. tendons/ligaments), loading without over stressing tissue or compromising healing process.  The following are Theraband exercises for Tibialis Posterior and Peroneus Longus, two muscles often impaired in injured ankles. Population: For individual unable to tolerate full weight-bearing.   Weight-bearing: Re-introduction to weight-bearing exercise will increase tolerance to standing and walking, in an attempt to normalize gait pattern and reduce stress on neighboring joints and tissues. Population: For individual several days/weeks after injury, tolerant to full weightbearing on affected limb.   Balance/Stability/Proprioception: Challenge balance to restore proprioceptive feedback to neuromuscular system, increase awareness of body position in space and in relation to ground surface. Loss of proprioception is a risk factor for re-injury.  What follows are several single leg exercises to challenge balance, proprioception, and nueromuscular control in all planes of ankle movement.  Population: For individuals able to weight-bear with minimal pain, ambulate short distances, and who display poor control, strength and stabilization. Power/Plyometric: Plyometric movements are similar to game-time speed and intensity, stress joints and tissue to maximal extent. Agility and control of momentum is often impaired by ankle injuries, and can lead to further injury if not appropriately addressed. Final stage before return to sport-specific activities.  The following exercises demonstrate a few ways to introduce higher level, sport-like challenges in the sagittal and frontal planes. Population: For individuals able to run/jump without pain, returning to sport-specific skills training.   (A licensed physical therapist can perform a thorough evaluation to help determine if you are a good candidate for this treatment as part of a program designed to help get you back to full activity after an ankle sprain. For more information on the treatment of ankle sprains, contact us  at Elevate PT & Fitness, or your physical therapist specializing in musculoskeletal disorders.) _________________________________________ References:  (1)Predictors of lower extremity injuries at the community level of Australian football. Gabbe BJ, Finch CF, Wajswelner H, Bennell KL. Clin J Sport Med. 2004 Mar; 14(2):56-63. (2)Journal of Orthopaedic & Sports Physical Therapy, 2013 Volume:43 Issue:7 Pages:456–456 DOI: 10.2519/jospt.2013.0504 (3)The Relationship between Muscle Function and Ankle Stability. Lentell G, Katzman LL, Walters MR. J Orthop Sports Phys Ther. 1990; 11(12):605-11. (4)Considerations for Normalizing Measures of the Star Excursion Balance TestPhillip Gribble-Jay Hertel – Measurement in Physical Education and Exercise Science – 2003 (5)A systematic review on ankle injury and ankle sprain in sports. Fong DT, Hong Y, Chan LK, Yung PS, Chan KM. Sports Med. 2007; 37(1):73-94. (6)The team physician and return-to-play issues consensus statement http://www.amssm.org/MemberFiles/RTP_Cons_State.pdf Published 2002. Accessed September 2011  (7)Initial changes in posterior talar glide and dorsiflexion of the ankle after mobilization with movement in individuals with recurrent ankle sprain.Vicenzino B, Branjerdporn M, Teys P, Jordan K. J Orthop Sports Phys Ther. 2006 Jul; 36(7):464-71.

SHOULDER FOUNDATION STABILIZATION SERIES

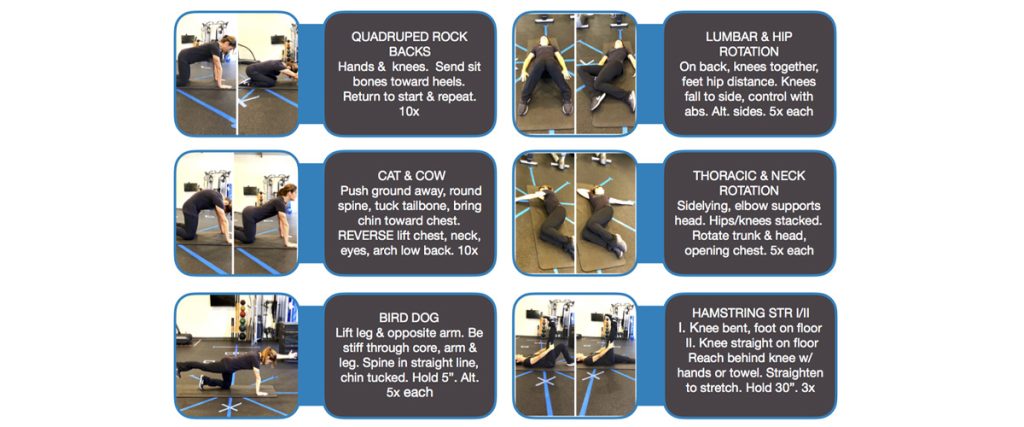
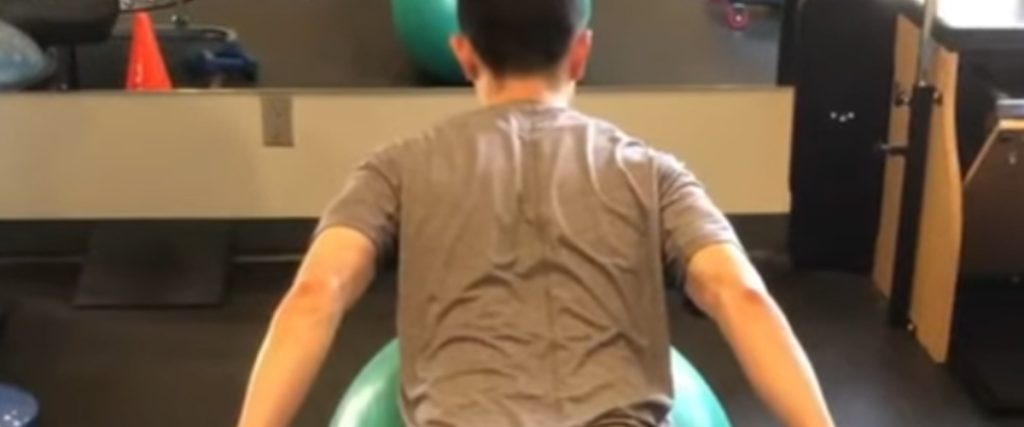
ELEVATE Shoulder Stabilization Series Part I DO YOU HAVE SHOULDER PAIN?  One of the most common impairments we see among our patients with shoulder pain is weakness of the muscles that control the scapula (aka the shoulder blade). This is distinct from the rotator cuff muscles which control glenohumeral joint (aka the ball and socket joint). If the shoulder was a house, the scapula would be it’s FOUNDATION. If the foundation of the shoulder is compromised then the risk injury may be higher. Three key muscles that help strengthen and control this foundation are the middle/lower trapezius and the serratus anterior. Together, these muscles help keep the scapula secured onto the thoracic spine during overhead shoulder movement and allow the rotator cuff muscles to work more effectively, thus improving performance and reducing injury risk! If you want to learn how to make a strong shoulder foundation, read on for PART II of our Shoulder Stabilization Series 🏼   ELEVATE Shoulder Stabilization Series Part II HOW TO STRENGTHEN YOUR SHOULDER FOUNDATION PART II  – Progression Level 1️⃣ (Isometrics): Prone A’s, T’s, and Y’s. While laying on your stomach of on a Swiss ball, position your arms to form an ‘A’, ‘T’, or ‘Y’. Pinch your shoulder blades back as if you were trying to grab a pencil with your shoulder blades. At the same time drive the shoulder blades down towards your feet to prevent excessive shrugging. Hold each position for 30-60 seconds for 2-3 sets. This exercise appears simple but can be extremely challenging for those who are not used to recruiting these muscles. _ Progression Level 2️⃣ (Isotonics): In the same positions at level 1, add resistance via weight or resistance bands and allow your arms to slowly lower to the ground (eccentric phase) and then rise back to the starting position (concentric). Choose a weight where 3 sets of 15 can be performed successfully. _ Progression Level 3️⃣ (sitting or standing): the third progression helps train the individual to use the middle and lower trapezius in a more upright position, which is where people more commonly perform overhead movement throughout their day. Using a resistance band or cables, perform the A’s, T’s, and Y’s in sitting or standing (standing tends to be more challenging due to it being easier to compensate with the lumbar extensors). Choose a weight where 3 sets of 15 can be performed successfully. _ This progression is not the only way to improve scapular strength but it has been found to be effective for improving mid/low trapezius recruitment and shoulder functional outcomes among persons with shoulder impingement. _ De May et al. Scapular Muscle Rehabilitation Exercises in Overhead Athletes with Impingement Symptoms. The American Journal of Sports Medicine. 2012. _ Read on for Part III where we go over how to strengthen another crucial shoulder muscle: the serratus anterior!   ELEVATE Shoulder Stabilization Series Part III HOW TO STRENGTHEN YOUR SHOULDER FOUNDATION PART III  _ The serratus anterior is another underutilized muscle group among those with shoulder dysfunction. Here are a few exercises to improve activation and strength of this muscle. _   Exercise 1, Quadruped Rockbacks: Begin by going onto your hands and knees. In this position, push your hands  into the ground as if you were trying to push the earth  away from you while also trying to spread the floor apart with your hands. Maintain this force while bringing your butt towards your heels similar to a child’s pose, and then return to the start position. You should feel muscle activation occurring at the outside of your shoulders. Recommended dosage: 3 sets of 15 repetitions. _ Exercise 2, Quadruped Circles: Similar to exercise 1, begin on hands and knees and press into the floor with your hands while also spread the floor apart. Shift your body weight to either the right or left hand and begin moving your body in circles over that hand. You should feel muscle activation occurring at the outside of your shoulders. Recommend dosage: 3 sets of 15 circles clockwise and 15 circles counter clockwise and then switch hands. This can be progressed to a modified plank or full plank position. _ Exercise 3, Scapular Push-Ups: Begin on hands and knees similar to the first two exercises. Allow your shoulder blades to relax, bringing your chest closer to the ground without bending at the elbows. Then bring your chest away from the ground by bringing your shoulder blades forward (towards the ground). While in this position, lift the knees 1 inch from the ground to increase resistance against the shoulder girdle. Recommend dosage: 3 sets of 15 repetitions with 1 second hold. This can be progressed to a modified plank or full plank position.

TEAM MOVEMENT PERFORMANCE TESTING & TRAINING SESSIONS

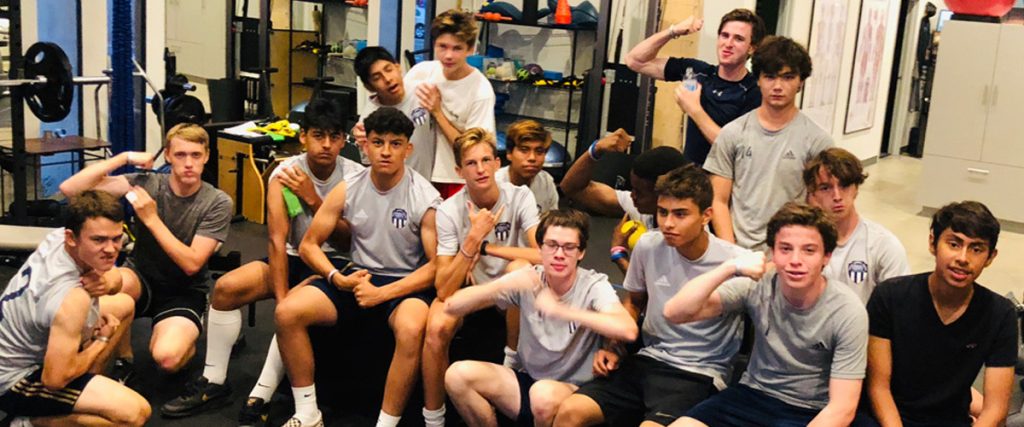
Team Movement Performance Testing will reveal your players’ risks for injury.  Teams will learn what to do to bulletproof against them, and increase their odds for staying healthy and playing great during the season. This is typically a 90 minute session at Elevate or on location.  Your team will work with 2 of our multi-credentialed Doctors of Physical Therapy, Certified Strength & Conditioning & Youth Sports Specialists. Team Testing includes: 3 Evidence-based tests on video used to detect movement impairments that put your athletes at risk for injury Video analysis breakdown with the athletes Movement training for injury prevention 3 key strength exercises This testing is designed specifically for the running, cutting, jumping athletes.  We test soccer, lacrosse, basketball, volleyball, tennis, football athletes and more! We use video analysis to breakdown movement patterns and teach the athletes — this is extremely eye opening and impactful for the athletes.  They love seeing themselves, everyone learns a great deal, and they have lots of fun together, making it an excellent team building activity too. Coaches typically make this session a “required practice”, which results in a full team turnout and maximum benefit.  (We reserve the time of the 2 Elevate staff members and block the gym space for your team, so thank you for helping your athletes to make their team’s scheduled time.) COACHES & PARENTS SCHEDULE YOUR TEAMS (OR INDIVIDUAL ATHLETES) FOR TESTING by emailing concierge@elevateptfit.com or calling 424.322.8585 Read “IS YOUR ATHLETE AT RISK” to learn about our testing, the research behind it and the benefits.                 

SURF STRENGTH SERIES

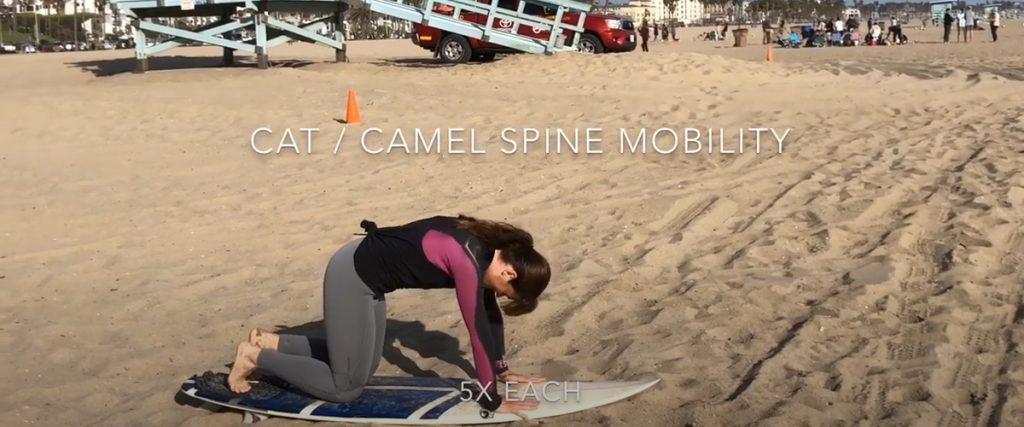
Dynamic Warmup for Surfers Research is clear that a dynamic warm-up (vs. static stretching) is best to prepare for sport ️ and to prevent injuries. A sport-specific warm-up is specially designed to move the body through the necessary range of motion and activate the neuromuscular system in ways that simulate the sport. ‍Surfing is a high demand sport with significant injury risk. Up to ⅓ of surfers sustain an injury each year requiring medical attention, missed work, or time off from surfing,  and 91% of surfers have sustained an injury surfing in their lifetime. We see lots of injured surfers at Elevate. Most often we hear that they don’t warm-up at all,🤭 and don’t have an exercise regimen to get their bodies strong for the great demands of surfing. A surf-specific dynamic warm-up will go a long way to help mitigate the risks and prevent injury (especially when combined with our surf-specific strength exercises coming next week). We know the waves are like a Siron song calling you the minute you feel the sand in your toes, but put earplugs in for just 5 minutes and prepare your body for the awesome intensity of surfing!   What a surf-specific dynamic warm-up can do for YOU: Increase core temperature Increase blood flow to muscles Increase stimulation to mechanoreceptors in joints Increase stimulation to the central nervous system Increase musculoskeletal control Increase confidence for performance Increase movement through the range of motion demands for the upcoming activities Improve exercise / sport performance Reduce risk for injury Scap Strength for Surfers Surfers, swimmers, water polo players and other water sport athletes who present with shoulder pain often have weakness in / poor control of posterior chain shoulder girdle musculature including the infraspinatus of the rotator cuff and the trapezius scapular muscles.  . Elevate Founder Dr. Meredith Soelberg PT, DPT, MBA demonstrates a few simple  exercises to address the common deficits. All you need is a Theraband to help get these specific muscles doing their job better for top SPORT PERFORMANCE and to PREVENT INJURY.  Shoulder external rotation with Theraband – this is a TWO STEP exercise, to emphasize the scapula stabilizers and the infraspinatus cuff muscle. Squeeze shoulder blades together and down to stabilize. 2. With elbows at 90 degrees and at your sides, AND shoulder blades squeezed together and down, PULL the band apart.  Hold 3 seconds. Slowly release. Repeat 10x. 3 sets… Cheerleader Series’ Ts and diagonals with Theraband – stand tall, shoulders away from ears. T – will emphasize the middle trapezius fibers.  Elbows straight, shoulders at 90 degrees, pull band apart to make a T shape.  Give a squeeze to your shoulder blades at opening of the T. Then slowly release back to start position. Alternating Diagonals – will emphasize numerous important scapular muscles reciprocally.  Start in the same start position as the T exercise. Pull band apart with one arm pulling up, the other pulling down. Palms face forward, the band is in a diagonal, elbows straight. Give a squeeze to your shoulder blades  Meet back in the start position. Then do the opposite diagonal. . . What’s great about the diagonals is the reciprocal movement pattern it trains – very functional for the movement in these sports!. 1 T + 1 diagonal each direction = 1 rep.  Repeat 10x. 3 sets. ❗️KEEP ELBOWS STRAIGHT. ❗️ . If you’re having shoulder pain, come in and our Doctors of Physical Therapy can evaluate it, get you out of pain, and started on an injury and sport specific program. Need a Theraband?  We’ve got all colors!   Strengthen your Serratus Anterior for Surfing The Serratus Anterior does so much for the surfer! It wears a lot of hats as a protractor / abductor, posterior tilter, upward rotator and stabilizer of the shoulder blade!  It’s particularly important in the intricate biomechanics of reaching overhead in the paddle, and for a strong pop-up. … Lack of control, strength, or activation of this important muscle is believed to be associated with painful shoulder conditions found in surfers and other water sport and “overhead” athletes.  Here’s a progression of “scapula pushups” with a Theraband for added resistance to isolate that serratus anterior, and at the same time, work your core muscles that are also critical for surfers and water sport athletes!  Try 3 sets of 15 of level 1.  When that gets easy, try the next level!.

ELEVATE’S GUIDE TO MEDITATION

When we experience pain or are going through a period of rehabilitation often this is accompanied by an increase in psychological stress. This stress may be due to financial burden, inability to exercise or perform usual activities, and being in physical pain. Stress can cause physiological changes such as elevated cortisol levels, increased heart rate, increased blood pressure and a dysregulated immune system.  Meditation has been shown to decrease blood pressure,  regulate the immune system, improve respiratory rate and sleep (van der Zwan 2015) As we work to improve our physical health it is also important to take care of our mental health. Meditation is a great way to enhance the overall effects of the rehabilitation process.   Here is Part 2: of our meditation series: “The HOW”- Intro to basic meditation and ways to incorporate it into daily life.   Meditation Tips and Techniques: Timing: Meditating at first can be a challenging and frustrating task, therefore timing is very important. It is crucial that you choose a time of day where you are not too tired or overwhelmed by the things happening around you. I have the most success meditating in the morning before anyone else in the house is up and the world around me is quiet.   Position: Seated or lying in a comfortable position. Make sure that you have everything you need in place so that you do not fidget or become focused on your discomfort as you will be in this position for at least 10 minutes. Feeling uncomfortable is a really easy way to lose focus.   Surroundings: What room or space gives you the most joy or feelings of relaxation? Living room? Kitchen? Office space? Bedroom? Favorite chair under a window? If any of these things I listed sparked immediate anxiety then this is NOT the place you want to glide into that peaceful state of mindfulness and relaxation.   Breath and Sequence: Sitting in one place for 10 minutes is the “easy” part. Calming and quieting your mind for 10 minutes without judgement is a completely different beast. By using your breath and a body scan sequence we can help to calm our mind and sink deeper into that meditative state. Start at your feet and take note without judgement of each segment of your body while sending a breath of love, appreciation and gratitude to that area.    10 day challenge:  We challenges you to meditate for 10 minutes a day, over the course of 10 days! The best way to create new habits is consistency and practice! Just like we exercise and strengthen muscles skeletal muscles we must also strengthen our mindfulness muscle! See how you feel after the 10 days and maybe reflect on ways that you were successful and not as successful. What worked best and what was challenging?  Tell us how you did!   Meditation Part 3: What tech can help you meditate?  Top apps and gadgets to help guide us in our journey of mindfulness. Insight Timer  Pros: This app allows you the freedom to pick and choose depending on how long you have to practice, what style you’d like (e.g. body scan, loving kindness, anxiety/stress reducing, etc.), or just set a timer and sit without guidance,” Cost: Free! .   YogaGlo Pros: There area large variety of guided meditations to choose from with such well-respected teachers. Plus, you can customize your workout by choosing the length, teacher, and/or level you want, as well as a variety of topics and focal points that can help you zero in on specific meditation goals Cost: Free 7-day trial/ $22.99 per month after trial.   Headspace Pros: One of the best known meditation apps. They offer hundreds of guided meditations, mini-meditations, sleep sounds, SOS meditations for emergencies, meditations for kids and animations to help you better understand meditation Cost: $7.99 to $12.99 per month after trial.   Ensō  Pros: For those well-versed in meditation, I love the Ensō app which has a simple timer that you can set with bells at different intervals to keep you alert and set a soothing endpoint to your practice. Cost: Free, in app purchase.   Calm Pros: Contains topics ranging from calming anxiety to gratitude to mindfulness at work—as well as sleep sounds, nature sounds, and breathing exercises—you can really choose your focus. “There are new meditations every day, progress trackers, and seven-day and 21-day programs for beginners Cost: Free, in app purchase. 10% Happier: Meditation For Fidgety Skeptics. 10 Percent Happier For Fidgety Skeptics. Pros: This app has meditations aimed to help users with anxiety and sleep, and there is new content each week. More than 500 videos and additional content added each week. Cost: Free and premium version.