Elevate Physical Theraphy & Fitness

Author name: Elevate PT & Fitness

Elevate’s Favorite Level 2 Core Exercises

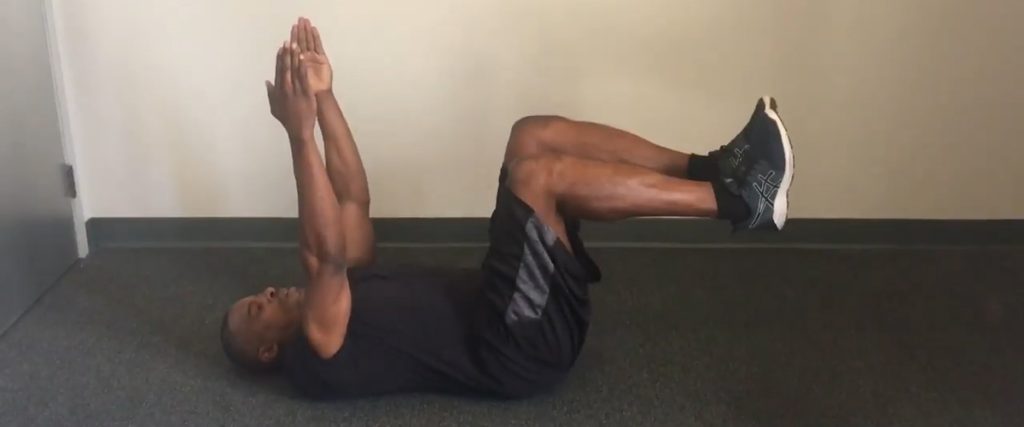
Now that you’ve mastered how to brace your abdominals and create stability while moving and breathing in level 1, let’s add some more challenges!💪🏻 This series progresses the coordination and stability of core muscles while BOTH arms and legs move, as well as the demand by adding longer lever arms, and load! This Dead-Bug series of core stability exercises is a great way to improve lumbopelvic stability that helps reduce the probability of lower back pain or injury. Here are several progressions to get started.   Dead Bug 90/90 Heel Drops Lie on the ground with your arms extended and packing the shoulders tightly down and back. Bring your knees up to 90-degrees while pressing your lower back into the floor and drawing the belly in. While maintaining your lower back firmly on the ground, slowly lower one leg while maintaining 90-degree knee bend and lowering the opposite arm ear level.    Pause for a 1-2 count and then return to the home position. Alternate back and forth between sides without allowing the lower back to rise. Perform 2 sets of 8 reps per side Dead Bug 90/90 Leg Extensions Lie on the ground with your arms extended and packing the shoulders tightly down and back. Bring your knees up to 90-degrees while pressing your lower back into the floor and drawing the belly in. While maintaining your lower back firmly on the ground, slowly extend one leg forward while lowering the opposite side arm to ear level.   Pause for a 1-2 count and then return to the home position. Alternate back and forth between sides without allowing the lower back to rise. Perform 2 sets of 8 reps per side Dead Bug  – Straight Legs Lie on the ground with your arms extended and packing the shoulders tightly down and back. Extend your legs up toward the ceiling while pulling your toes toward your shins as you press your lower back into the floor and draw the belly in. While maintaining your lower back firmly on the ground, slowly lower one leg toward the floor while lowering the opposite side arm to ear level.   Pause for a 1-2 count and then return to the home position. Alternate back and forth between sides without allowing the lower back to rise. Perform 2 sets of 8 reps per side Alternating Straight Leg Dead Bug with Medicine Ball Lie on the ground with your arms extended and packing the shoulders tightly down and back while holding a medicine ball. Extend your legs up toward the ceiling while pulling your toes toward your shins as you press your lower back into the floor and draw the belly in. While maintaining your lower back firmly on the ground, slowly lower one leg toward the floor and return to home position. Perform the same movement with the opposite leg before returning to the home position. Lastly, lower the ball until the arms are at about cheek level and return to home position.   Rotate between all three moves without allowing the lower back to rise. Perform 2-3 sets of 8 reps each Dead Bug with Overhead Medicine Ball   Lie on the ground with your arms extended and packing the shoulders tightly down and back while holding a medicine ball. Extend your legs up toward the ceiling while pulling your toes toward your shins as you press your lower back into the floor and draw the belly in. While maintaining your lower back firmly on the ground, slowly lower one leg toward the floor as you lower the arms holding the medicine ball to about cheek level. Perform the same movement with the opposite leg and arms before returning to the home position. Perform 2-3 sets of 8 reps each

Elevate’s Favorite Level 1 Core Exercises

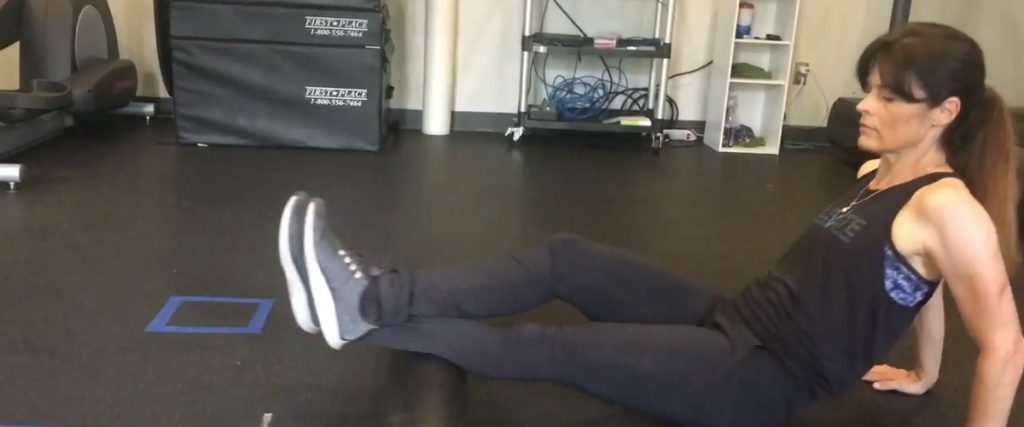
Get your *abs* in gear! Did you know your core includes the joints and muscles of the abdomen, spine, pelvis, and hips? The muscles of the core are like an orchestra of muscles, working together, creating ‘optimal control’ between movement and stiffness depending on the demand.  Strength PLUS coordination and control of the core musculature are a cornerstone of quality movement and performance and are important in preventing pain and injury as well. Here’s one series of exercises to focus on the abdominals section of your “core orchestra.” This series is not easy when done correctly!  It combines core stabilization with movement and breathing (an often forgotten yet critical piece in core stability), helping to lay a foundation in the neuromuscular system to build on with more challenging functional activities and demands. To start, place your fingers on the inside rim of your pelvic bones, gently lower your low back to the floor, feel the space fill up under your fingers as the deep abdominals activate.  Bring your ribs down toward your pelvic bones, creating a bracing of your abdominals.  Remember to relax your shoulders and hold that activation as you BREATHE normally.  Try to do 10 – 20 breaths keeping that contraction.  It’s not easy! Then proceed with maintaining that stability with your abdominals when adding leg movements as shown.  Keep the spine lowered toward the floor and ribs toward the pelvic bones the whole time, trying not to arch, and continue to BREATHE!  Your trunk should look like a cylinder. 1. Supine Marching 2. Up-up, Down-down 3. 90/90 Heel Taps 4. 90/90 Leg Extensions Try each one 30 – 60 seconds, with a short rest in-between exercises.  Can you do it?  If you can, then check out the advanced exercises in “Level 2!”

Is Your Athlete At Risk?

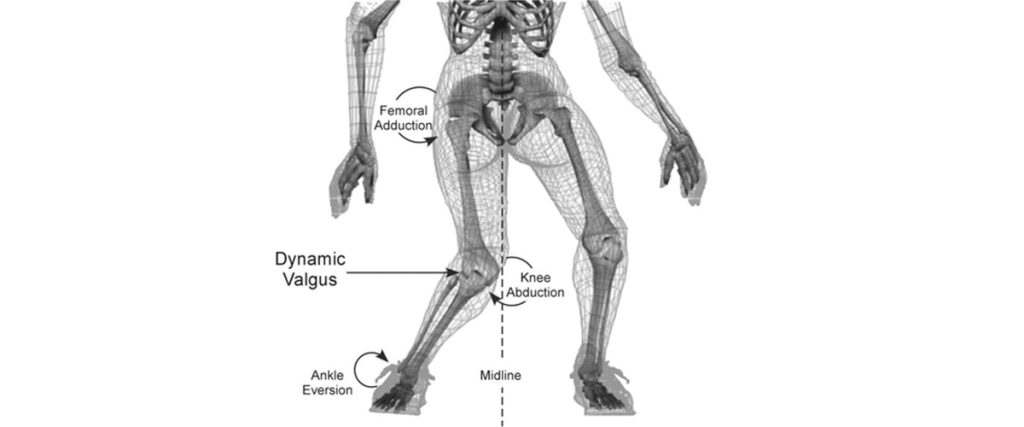
KNEE INJURIES – IS YOUR ATHLETE AT RISK?  THREE EASY TESTS! Movement Performance Assessments are a key measure to reveal young athletes’ risks for injury, learn what to do to bulletproof against them, and increase their odds of staying healthy and playing great during the season. PREVENTABLE KNEE INJURIES The knee is the most commonly injured joint in adolescent athletes.  Lost play time, not to mention pain, rehab, and potential long-term disability are common realities with knee injuries.  Some of the more common ones are patellofemoral pain (“runner’s knee”), IT Band Syndrome, and patellar tendinitis (“jumper’s knee”), ligament sprains, and meniscus tears.  Two additional injuries common in the skeletally immature are Osgood Schlatter’s disease and osteochondritis dessicans (OCD).  The less common (yet numbers are rising in our youth athletes) and more catastrophic injury is the ACL (anterior cruciate ligament) tear.    Seventy percent of ACL tears are non-contact injuries that occur during movements like cutting, twisting, decelerating, and landing from a jump, without making any contact with another player, in sports like soccer, basketball, lacrosse, football, volleyball, and tennis. It’s important to note too that there is a four to six-fold greater incidence in female athletes compared to males playing the same landing and cutting sports. Current research by many including Dr. Christopher Powers, Professor of Biokinesiology & Physical Therapy at USC, has revealed a number of modifiable risk factors associated with knee injuries, including the devastating ACL tear, i.e. weakness and poor control of the trunk, pelvis, hips, and knees, and poor body alignment during movement.  Dr. Timothy Hewett of The Mayo Clinic Orthopedic Biomechanics Lab describes these modifiable risk factors as: ligament dominance; quadriceps dominance; leg dominance; and trunk dominance, all of which can be changed to improve the odds of avoiding an injury.  These are preventable injuries. But how? TEST to uncover deficiencies associated with injury  Get key muscles strong Improve high-level balance  Train strength & balance with optimal movement  Incorporate into sport-specific movement (“neuromuscular control”) during warm-up and training  Good movers become better athletes and have fewer injuries.  TESTING There are numerous tests with complex scoring systems and criteria that we run for individuals and teams both in the clinic and on the field.  We use the latest evidence in testing and advanced technology to determine an athlete’s risk profile, we score the tests individually and look at them collectively to determine an athlete’s level of risk for injury.  Then we teach what to do.   If an athlete has been injured, we use these tests to determine return-to-sport readiness as well.   But here’s the good news… A  few simple tests can detect key risk factors associated with knee pain and injuries, including the devastating ACL tear. Step-Down Test 10 Second Tuck Jump Drop Jump Test The Step-Down Test is a low impact, basic indicator of an athlete’s single leg, dynamic strength, control, and preferred movement patterns.   What to look for that reveals greater risk for injury: Excessive leaning of the trunk (poor trunk control) Excessive drop of one side of the pelvis toward the ground (poor pelvic control) (#1 and #2 can often go hand-in-hand, as in the video, and even though the knee may not appear to drop inward (valgus angle), the combination of the two can create a valgus torque at the knee.) Rotating the thigh and the knee collapsing inward (dynamic valgus/poor hip utilization) Upright trunk (quadriceps dominance / poor hip utilization) The 10 Second Tuck Jump, formalized and studied by Dr. Gregory D. Myer, sports biomechanist at the Cincinnati Children’s Hospital Sports Medicine Biodynamics Center, is a ‘double leg ballistic/plyometric’ activity (jumping on both legs), increasing the demand to the system compared to the Step-Down Test.  It’s a great one to do on the field because it doesn’t require any equipment.  Have your athlete try it.  Take a video and use slow motion if possible. Jump for 10 seconds, trying to lift knees to hip height and trying to land on the same spot, without pausing. While watching the video, see if your athlete’s knees collapse inward (dynamic valgus), like the knees are kissing, as the feet hit or push off from the ground. If they do, like the young woman in the video, your athlete is at greater risk. If your athlete looks more like the young man in the video, the chances of injury are lower.   We actually score 10 criteria in this test, but here are five easy things to pick out that will give you insight into risk for injury: Knees collapsing inward / dynamic valgus Knees uneven and not reaching hip height Stiff knee landing Landing on one leg before the other Not remaining in the same ‘footprint’ throughout the 10 seconds The Drop Jump Test “before” video demonstrates “dynamic valgus” (inward collapse of the knees) in a volleyball athlete.  It’s one movement pattern associated with knee pain and injuries.  The “after” video demonstrates this same athlete after some strength, balance and movement training, using a band above the knees to cue and facilitate her gluteal muscles to control the movement and protect her knees. Dynamic valgus, combined with poor shock absorption and poor trunk control during cutting, twisting or landing can overload the ACL in a split second.  Wear and tear from dynamic valgus during daily activities and sports is also associated with the more common knee injuries mentioned.   COMPREHENSIVE MOVEMENT PERFORMANCE TESTING Try these three tests at home or on the field and see how you do.  Come in to do a comprehensive Movement Performance Assessment of 8 tests, including running and cutting sport-specific tests with video analysis with our PT team specializing in sports and biomechanics and learn what to do.  Taking time to learn which modifiable risk factors your athlete demonstrates and what to do about them will help your athlete avoid injury, achieve top performance, and STAY IN THE GAME.  

Hamstring Health, Part 3: Advanced Strength & Flexibility

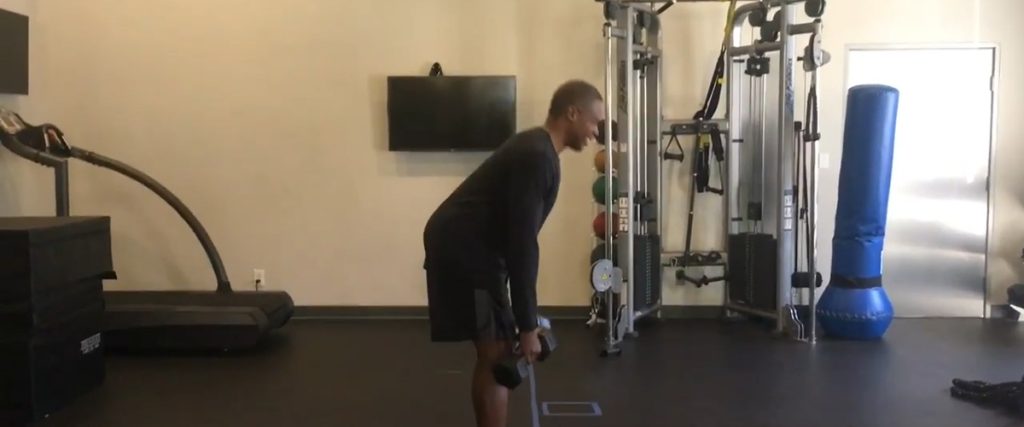
In part one of our Hamstring Injury Prevention Series, we mentioned that one of the more common injuries in running sports is hamstring strains.  Now that you know some basic but important ways to start strengthening and lengthening  your hamstrings from part 1 and 2, time to get “functional” in Part 3 and train in standing, end-range positions with eccentric loading, where hamstring injuries typically occur.  Eccentric lengthening and neuromuscular control exercises have been shown to reduce risk of injury.  Gotta do these! Start off with the Dumbbell Romanian Deadlift and master the proper posture and positioning before moving on to the series of single leg movements. Here is the full series!  Dumbbell Romanian Deadlift Stand with feet hip-width apart and dumbbells in front of the legs. Push the hips back slightly with a slight bend in the knee and lower the dumbbells down the front of the legs while maintaining a neutral spine (flat back) until the dumbbells are just below the knee. Bring the hips forward as you stand and squeeze the glutes in the top position. Perform 3 sets of 10-12 reps Dumbbell Single-Leg Romanian Deadlift Stand with feet hip-width apart and dumbbells in front of legs. As you lower the dumbbells down the front of one leg with a slight bend in the knee, lift the other leg behind you no higher than waist height, keeping your hips level. The rear leg can be straight, or with a slight bend in the knee, just be sure not to raise the leg higher than hip width.  Then come back up to your starting position, by pushing the hips forward while you pull the weights up the base leg. Simultaneously let your rear leg go back down toward the floor.  Perform 3 sets of 8-10 reps per leg , Single-Leg Romanian Deadlift with Rotational Toe-Touch Stand with feet hip-width apart and dumbbells in front of legs. Slowly balance on one leg and lower the dumbbell from the opposite hand down to the foot or shin of the standing leg. Bring the hips forward while pulling the weights up the base leg, to return to the upright position, bringing the rear leg back down to the floor and the dumbbells above the shoulders Perform 3 sets of 8-10 reps per leg Walking Lunge to Rotational Toe-Touch & T-Lift Perform a walking lunge with one leg. Rotate the trunk and opposite hand toward the foot of the lead leg with good control. From that lunge position, push into a single leg T-Lift position while maintaining balance and pausing before moving into the next lunge. Repeat with control with the opposite leg. Perform 3-4 reps of 8-10 per leg Walking Lunge Rotational Toe-Touch to RDL Perform a walking lunge with one leg. Rotate the trunk and opposite hand toward the foot of the lead leg with good control. From that lunge position, push into a single leg Romanian Deadlift position while maintaining balance and pausing before moving into the upright position with weights over the shoulders. Repeat with control with the opposite leg. Perform 3-4 sets of 8-10 per leg

Hamstring Health, Part 2: Flexibility

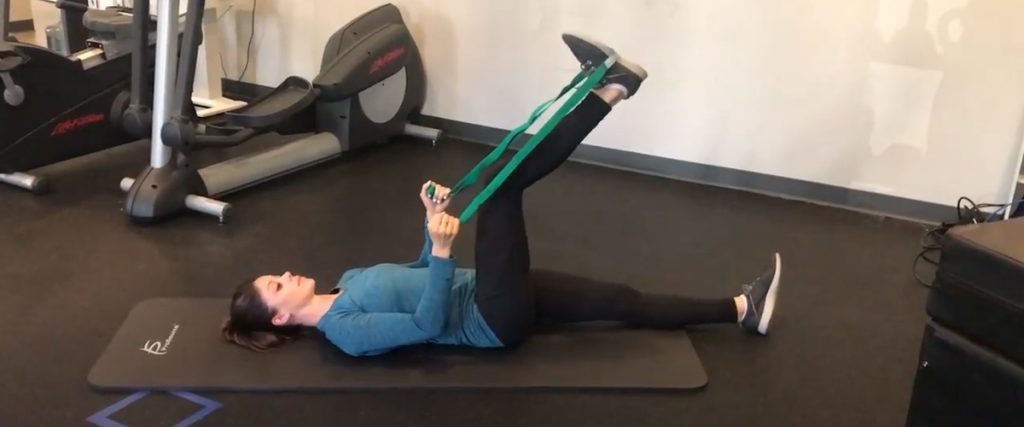
Don’t “pull a hammy” Part 2! Hamstring Flexibility. Since a major key in injury prevention is flexibility, here are our favorite stretches that not only lengthen your hamstrings, but also protect your back while you’re doing them. 🔹Hamstring Hooklie Stretch 🔹Seated Hamstring Stretch 🔹Wall Assisted Hamstring Stretch 🔹Dynamic Walking Stretch   Hamstring Hooklie Stretch: While lying down on your back, hook a towel or strap under your foot and draw up your leg until a stretch is felt in the back of your leg. Keep both hips down on the floor and your knee slightly bent during the stretch. Hold for 60 seconds. Seated Hamstring Stretch – While seated, rest your heel on the floor with your knee straight and gently lean forward until a stretch is felt behind your knee/thigh. Keep your back straight! Hold for 60 seconds. Wall Assisted Hamstring Stretch – Place a leg up a wall while lying on your back. Your other leg should be positioned with a straight knee and resting on the floor through a doorway or hall. Make sure your hips stay even and on the floor. Hold for 60 seconds. Dynamic Walking Stretch – While keeping a flat back, step one foot in front of you with a straight leg and flexed foot. Hinge over at the hips and lean forward into your front leg until you feel a stretch. Hold for 3-5 seconds before switching to the other leg. Repeat 10 times on each leg.

Hamstring Health, Part 1: Foundational Strength

Hamstrings: Part 1 Foundational Strengthening and Injury Prevention Exercises Hamstring injuries are one of the most common injuries in recreational and competitive sports!  Normal daily activities, training and competition time, and quality of life are significantly impacted, and re-injury rates are high.  Research suggests that hamstring weakness and lack of flexibility are modifiable risk factors associated with hamstring injuries. Prevention is key!   So let’s get them strong and flexible in this 3 part series! 
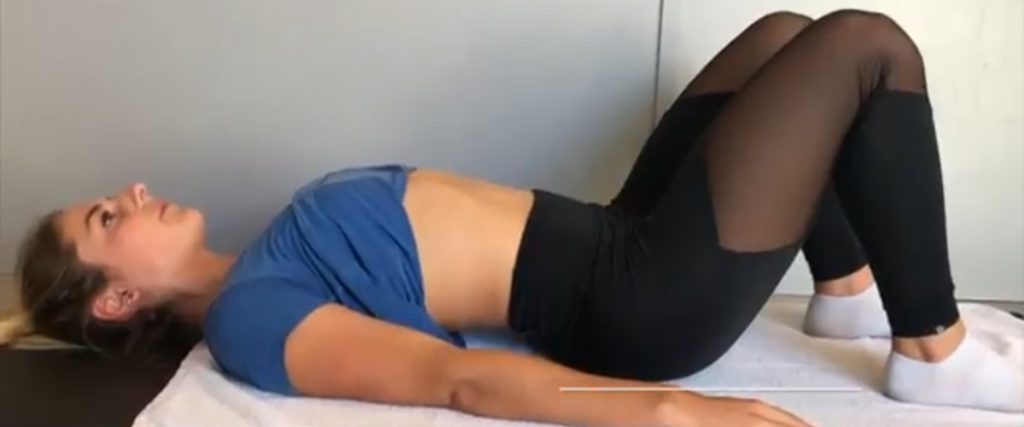
In Part 1, these foundational hamstring exercises are designed to strengthen the hamstrings under isometric, concentric, and eccentric loading, all the different loads they must tolerate successfully to avoid injury. Supine Hip Bridges with 5-second Hold Lay on your back with feet hip width apart and pulled closely in toward the hips.    Push the hips in the air while driving through the heels and squeezing the glute to start the exercise, holding the top position for 5-seconds. That is one rep! Slowly drop the hips to the floor and drive right back up into the elevated hip position, repeating the sequence from #2. Perform 3 sets of 10 reps Supine Hip Bridge Walk-outs Lay on your back with feet hip width apart and feet pulled in to the hips.    Push the hips in the air while driving through the heels and squeezing the glute to start the exercise. Slowly walk your feet away from your body while driving the heels into the floor and not allowing your butt to make contact with the floor.  Initially, you can walk half way out, and as you get stronger, work toward full extension of the knees and hips (this is hard!) When you get to full extension (or partial walk-out), slowly walk the feet back toward the hips while continuing to keep the hips elevated. Perform 3 sets of 6 walkouts Supine Soccer Ball Hamstring Curls Lay on your back with legs extended and heels on top of a soccer ball.   Dig the heels into the ball and elevate the hips off of the ground. While hips are elevated, bring the heels closer to the hips while controlling the ball until feet are flat on top of the ball. Slowly extend the legs back out until heels are on top of the ball again completing one rep. Perform 3 sets of 8-10 reps Nordic Hamstring Exercise From kneeling position (preferably with padding or something soft under the knees), have a partner hold your legs down from behind just above the ankle.   With your hands just out in front of your chest, slowly lower your torso to the floor while contracting your hamstrings to slow down the movement (Keep the hips fully extended. Stay long and tall). Once you can’t hold on anymore, extend the arms to guide the torso down the remainder of the way (into pushup position).   Push your hips back toward your partner and reset to the top position before the next rep. Perform 3 sets of 6-10 reps, trying to use your hands later and later in the controlled fall. Cook Lift Lay on your back with knees up and feet slightly in front of knees. Bring one knee up towards the chest hugging it closely while pushing the opposite heel into the floor. While driving through your heel, push your hips up while hugging in the knee and hold for a 2-count. Slowly descend back to the floor with good control.    Perform 3 sets of 8-10 reps for each leg.  

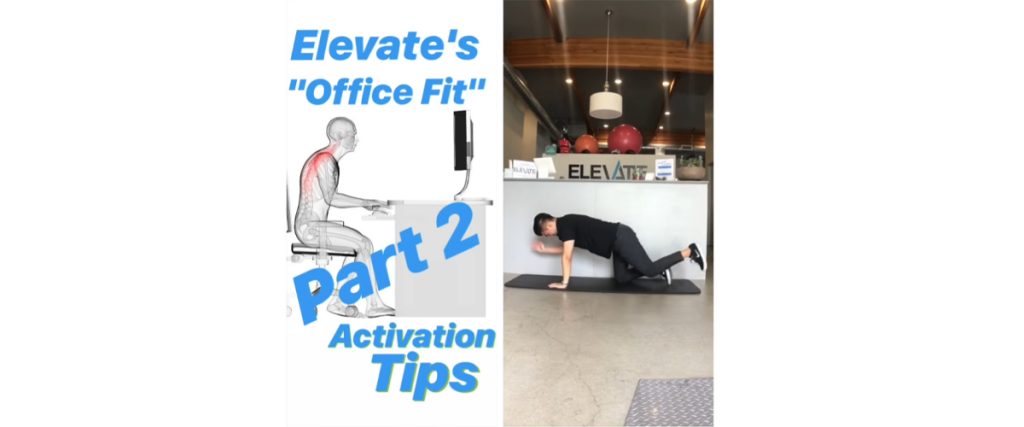
Elevate’s “Office Fit” Part 2: Postural Muscle Activation Tips

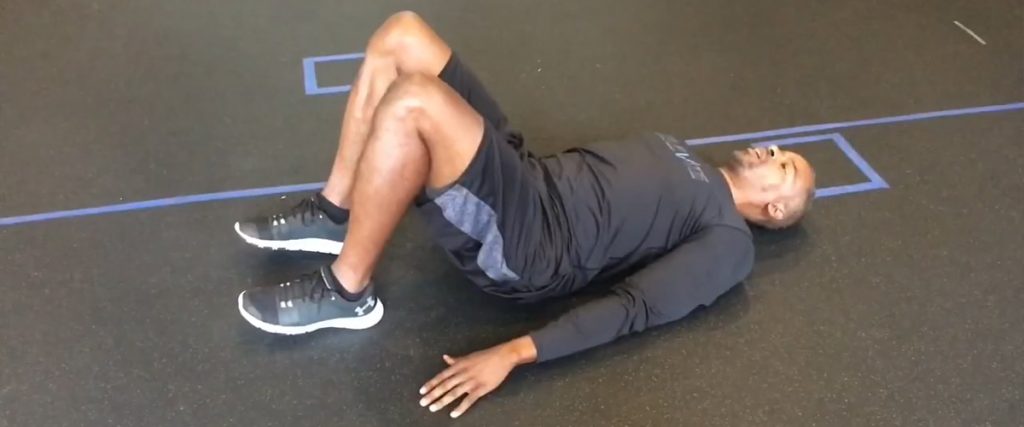
Last week we got you started with chasing away the desk dwelling blues through movement strategies and spine mobility exercises.  Now let’s turn the light switch on for key postural muscles that switch “off” and get weak when you let the desk chair do all the work for you when you sit, and sit, and sit.  Here are 5 favorites from the Elevate PT Team.  Do them right in your office, at home, in your hotel room, in a park, or at the gym.  Takes 5 minutes!  YOU CAN DO IT! 1. Bird Dog: Start on hands and knees with a neutral spine position (maintaining the natural, slight curve of the low back), abdominals engaged to hold that neutral position; push the floor away from you so shoulder blades don’t sag; tuck chin, eyes down, keeping head is in line with your shoulders.  Brace through your core, and extend one leg out while reaching the opposite arm forward.  Don’t let your back arch, and keep your hips square to the floor!  Hold the position at the top for a few seconds.  Imagine actively reaching “wall to wall” with the arm and foot, creating tension through all muscles in between!  Then slowly return to the start position before switching sides. Repeat for 60 seconds. 2. Sit-to-Stand Squats: Standing in front of a chair, brace your core, squeeze your glutes, and squat down with a strong hinge at the hips (with a forward trunk lean) until you touch your chair. Perform at a controlled pace (don’t rush!) for 60 seconds. Try to keep your core tight and glutes on throughout the entire range. 3. Butterfly: Start seated, spine straight, with your hands behind your neck, fingers overlapping each other, elbows out. Tuck your chin slightly, aligning ears over shoulders, squeeze your shoulder blades together, then lift hands a few inches away from your neck. Keep your shoulders down, away from your ears the entire time. Feel this between your shoulder blades and back of shoulders.  Hold for 10 seconds, and repeat for 60 seconds. 4. Glute bridges: Start on your back with your knees bent and your feet flat on the floor. Brace through your abdominals. then squeeze your glutes and use them to lift your hips off the ground. Make sure not to arch your spine as you lift your hips. Squeeze your glutes for a few seconds at the top, and lower your hips back down to the ground in a controlled motion, making the glutes and abdominals work the whole time.  Repeat for 60 seconds. 5. Wall angels: A) Beginner: Start by facing the wall, with your shoulders pulled down away from your ears. Slightly tuck your chin, and glide your arms up the wall in a slight “Y” motion.  Make sure your shoulders don’t lift as you move your arms upward. Repeat for 60 seconds. B) Advanced: Begin with your back against the wall, chin slightly tucked, and shoulders pulled back and down. Lift your arms up along the wall, while keeping your shoulders pulled down. Repeat for 60 seconds. You’re on your way to reversing the effects of sitting and taking your life back from the movement zapper.  Don’t be surprised when you feel happier, more energized, and productive at work as an added bonus from exercise in your day!    

Lower Body Foam Rolling

Feeling stiff or sore from a hard workout this weekend?  Or getting ready for a big one today to kick your week off?  There are lots of benefits to foam rolling both pre and post exercise!  Elevate’s co-owner Dr. Meredith PT, DPT demos what to do for the lower body using a high density foam roller, and Dr. Andy PT, DPT shows how to use a hand-held roller that you can easily throw in your gym or travel bag. The research is still emerging, but studies do show that foam rolling can improve range of motion; improve sport performance when combined with a dynamic warm-up; reduce DOMS (Delayed Onset Muscle Soreness) that can occur after a hard training session or a change in exercise regimen; and reduce the negative effects that DOMS can have on performance.  The actual mechanism by which it works is still unknown.  Does in increase blood flow to the muscles, stimulate the nervous system, relax tight muscles and connective tissues?  The jury’s still out, but the benefits are real. Here are key areas to focus on for lower body during warm-up and / or post-exercise, 30 – 60 seconds per muscle group. *Notice how to add more pressure through a muscle group by crossing one leg over the other (quads, TFL / IT Band, hamstrings, gastrocsoleus). . ▶Quads (Front of the thigh) ▶TFL / IT Band (Side of hip / thigh) ▶Hips / Glutes ▶Hamstrings (Back of thigh) ▶Gastrocsoleus (calves) ▶Anterior Tibialis (Shins) We have several different types of rollers in stock.  Stop in if you need one!

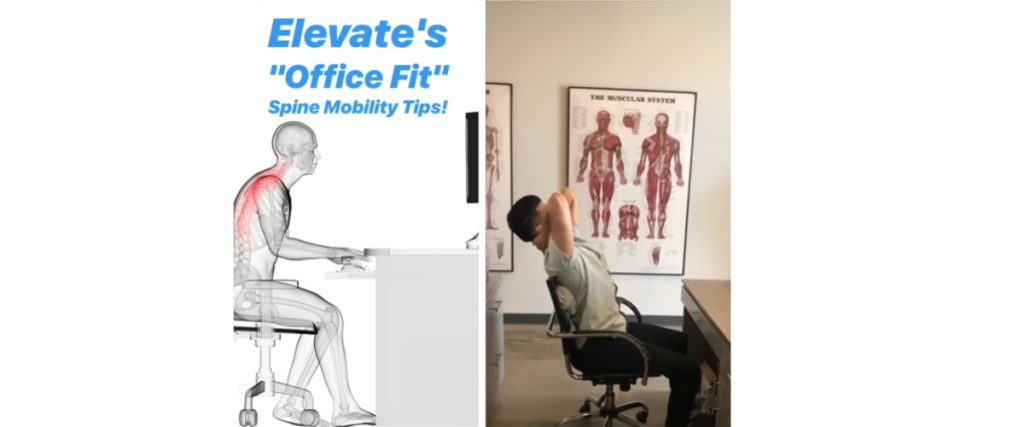
Elevate’s “Office Fit” Spine Mobility Tips

We’ve got your back!  Sitting for hours on end hunched over a desk and a computer is not what the spine is naturally built for, nor is any part of our bodies for that matter.  It’s not that sitting is so bad, it’s the lack of MOVEMENT due to the excessive sitting that’s the problem!  The result is stiffness in joints, tightness and weakness of muscles, and eventual long-term adaptation over time leading to pain and overuse injuries.  What can you do?  Start to incorporate mobility and activation breaks to reverse the sitting postures, lengthen what’s getting tight, and activate & strengthen what’s getting weak.  Here are some of Elevate’s favorite “Office Fit” movement and spine mobility tips from the PT team.  And look for more “Office Fit” tips coming next week too! Take movement breaks hourly.  Set a timer!  Stand up.  Walk to the water cooler.  Do a ‘walk and talk’ for a phone call or a meeting with a colleague. And try these: ❇Thoracic spine extension over the back of your chair. ❇Thoracic spine extension / shoulder stretch at your desk. ❇Thoracic spine rotation with neck rotation. ❇Standing cervical retraction (make a double chin!) with shoulder flexion. ❇Thoracic side bend + rotation in child’s pose and (deeper version) in quadruped. ❇Lumbar Rotation in supine. Pick a few and try several reps of each throughout your day! Work in a pain free motion. Which is your favorite? If you’re having spine pain, come in for an evaluation and we will customize a plan for your specific issue!

Elevate’s Ankle Sprain Rehab

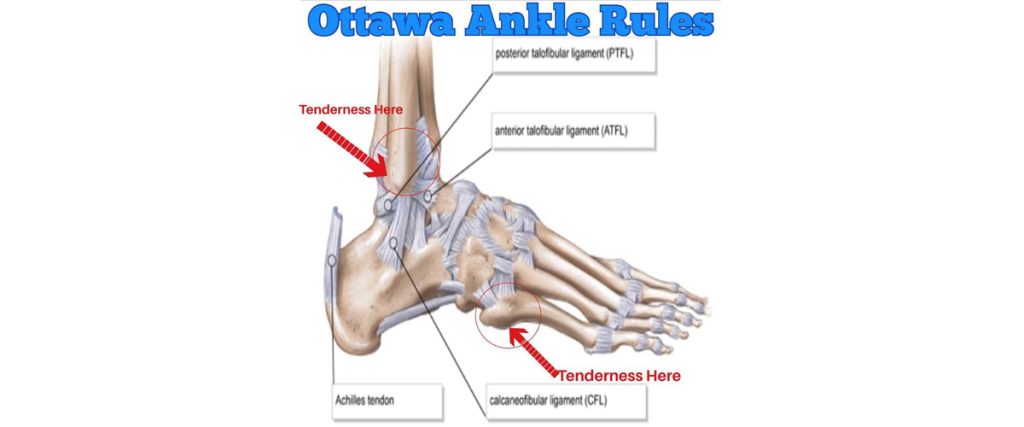
Sometimes it’s difficult to know if you’ve rolled your ankle or done something more that may require an x-ray. The Ottawa Ankle Rules help us decide whether or not an x-ray is warranted: Unable to put any weight on your injured side for 4 steps Tenderness at the base of your 5th toe. Tenderness 6 cm up from your ankle bone. If you have any of the above-mentioned rules, then you should get an x-ray to rule out a fracture. Lateral Ankle Sprains can vary in their severity. Clinically, ankle sprains  are generally classified into three groups: Grade 1: A stretch of the ligament that does not result in a tear. There is minimal swelling and tenderness, mild or no loss of function, and no mechanical instability of the ankle. Generally associated with strain to the ATFL. Grade 2: A partial tear of the ligament with moderate pain, tenderness, and swelling. There is some loss of function and presence of mild to moderate mechanical instability. Generally associated with strain to both the ATFL and CFL. Grade 3: A complete tear of the ligament with significant bruising, swelling, and tenderness. There may be an inability to bear weight on that foot, and there is significant instability of the ankle. Generally associated with strain to the ATFL, CFL, and potentially the PTFL as well. There may be swelling, bruising, and tenderness in your foot and ankle. It is important to note that the amount of swelling and bruising is not always indicative of severity of tissue damage. The best time to have a physical examination by your Physical Therapist is 4-5 days after your injury.     After an ankle sprain it is important to work on ankle mobility, motor control, and balance. The following exercises show a few examples of some exercises used to address those impairments. 1.Ankle CARs (Controlled Articular Rotations) – helps to regain mobility and useful as an assessment of motor control 2.CRAs Correctives – if you find an area of movement during your CARs that is more challenging or in uncontrolled (might be shaky or not a smooth path of movement), then you can work in that uncontrolled range to help improve your control over that particular range 3.Single Leg Balance – the video shows progressively more challenging ways of working on single leg balance. If you are in a lot of pain still and cannot bear your full weight on your injured side, you can do these exercises on your other side since there is a known cross-over effect for these exercises (training one side of the body will also have a training effect on the other side of the body) 4.Multi-directional reach – this works on your single leg stability in multiple planes of movement   In order to promote healing and help reduce the risk of future injury, it is important to progressively overload the tissues that support the ankle in order to create adaptation. The exercises in this video demonstrate a few ways that you can target loading of ankle inversion. Medial/Lateral Lunge Three Way Step Down Cross-Over Step Up Single Leg Medial/Lateral Reaches Single Leg RDL Single Leg Airplane With Rotations Single Leg Golfer RDL’s Single Leg Lateral Med Ball Toss You can gradually add weight to these to make them more challenging.